Cast-resin 3D printer parts

Red resin gear closeup!
The materials you'll need: resin (left), silicone mold material (colorful buckets), mold release, paper towels, cups, stirrers (for mixing the molding material)

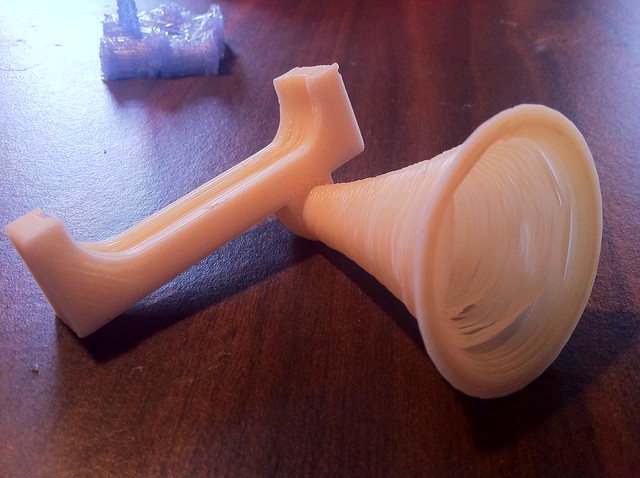
At Hive, we spent part of this summer making a bunch of cast-resin 3D printer parts. So instead of printing these parts up as we’d normally do, we made molds out of silicone mold material, and then filled these molds with resin whenever we wanted a new set.

The materials for this are cheap to acquire and easy to handle – some kind of resin (e.g. Smooth-On 326), and also material for making the silicone masters into which the resin is poured. We used Oomoo, but there are other materials out there. Other than that, you need standard stuff: mixing containers and mixers, napkins, etc.

Why would we do this? Well, in theory it’s easy and cheap if you can do it right, or if you aren’t too hung up on quality. And the parts end up looking extremely cool, especially if you use some tinting in your resin mixture. We created a couple parts sets with this tinting, which looked amazing.

However, we did run into some problems. For example, if you don’t have very elite molding skillz and materialz, you end up having to finish all the parts manually – this means deflashing, and also drilling the dozens of holes that your printer’s rods, bolts, and screws will go into. This takes a lot of time, and is very tough to do correctly. You also run the risk of breaking the parts when you drill them, which means… more molding. There are lots of other things to deal with too – what do you do if one of your master molds breaks? How do you acquire high-quality original parts to base your molds on? Etc.

Interested in trying this out for yourself? Here’s the RepRap Wiki page on the subject, and I’ve also written a lot more about our experiences here.
Build Your Own Open Source 3D Printer

Build Your Own 3D Printer!

ONLY ONE WEEK LEFT TO SIGN-UP!

In collaboration with NextFabStudio, we are offering a state-of-the-art and upgraded RepRap printer kit and accompanying 3-day Build Workshop from August 26th-28th. The class cost is $998 ($1,200 for non-members) and includes EVERYTHING you need to get up and running, and more importantly, a fully calibrated and fine-tuned robot.

CLICK HERE FOR MORE INFO AND TO SIGN-UP

Check out the time-lapse video below from our first class in Baltimore where we got 10 printers up and running in 3 days.

We’ll help you and a friend or two to build your very own open-source RepRap 3D printer, which has more than 4x(!!) the build volume of it’s closest competitor, the MakerBot Thing-o-Matic. Note that you will save $202 off the class if you’re a member of Hive76 or NextFab Studio. Total class cost for members is only $998. This is a crazy cheap deal! You can’t even buy a MakerBot for that price, let alone learn how to assemble it and fine tune it correctly in just a weekend.

There’s lots of additional bells and whistles on this bot that you won’t find anywhere else: custom machined aluminum motor couplers, linear bearings, the latest RAMPS electronics, and much more!

Any questions or concerns? Click Here to contact Jordan.

First RepRap World Tour 3D Printing Class from jmil on Vimeo.

BronzeBot: a 3D printer made of bronze

A few months ago Enrique Muyshondt (President of DesktopFab, aka Endeavour on IRC) gave us a set of Sells Mendel parts that he had cast for our work on various research projects at UPenn and here at Hive76. We slowly assembled it and got it running, and thanks to this past weekend’s RepRap World Tour stop in Baltimore, we have it running! In addition to 3D printing like a champ, we’re now using it to work on the firmware and customize printing scripts for tissue engineering research. We are grateful for the support!

The parts are cold cast bronze, this means Enrique painted several layers of bronze powder into his molds and then cast them with resin. What came out were the brown parts you see in the pictures and video below.

This 3D printer rocks. The RepRap 3D printing project still has a lot of rough edges, but that’s why we love it. We’ll have BronzeBot on exhibit at the next RepRapWorldTour in Baltimore, and then back in Philly in August to do it again.

Slideshow:

Learn to 3D print!

I’ve given up on 2D printers. 3D is the future!

print ninja
print ninja

Every single paper printer I have ever owned has been a constant source of pain and expense [example]. My experience with 3D printers thus far has been slightly better, but a magnitude cooler. The payoff for designing and printing your own real thing out of plastic is a real joy. That’s why some people call me obsessed with these 3D printers, and also why I feel the need to share!

Learn to print in 3D! We are running our SketchUp class again with 2 new dates: 4/17 and 5/1. Both Sundays and both from 10am – 3pm. [avoiding religion jokes here] These dates are separate; it’s not a 2-part class.

Grab a ticket today. $25 for either date:
SketchUp 4/17 SketchUp 5/1

Continue reading “Learn to 3D print!”

FDM2000 progress

Adam, Peejay, Justin, and I met Saturday to see just how fµ¢%ed our old enterprise Stratasys FDM 2000 is.

toolhead
Toolhead

To catchup: we got a Stratasys FDM2000 from a garage sale for a song and it came with lots of unknowns. It has sat in our hackerspace and moved with us for almost 2 years.

These things are in good order:

  • All 3 axes
  • Two extruder steppers and gearboxes
  • Two extruder heaters and the envelope heater
  • Onboard controllers
  • Lights
  • Model liquefier hot end

Problems that we found:

  • Support liquefier blew out. Need to tear down and fix.
  • Can’t connect via software. May be related to Adam’s serial adapter.

Great news! We have tons of consumables! Spools and spools of ABS, support material, some cool looking elastomer and foam for the build platform.

The white whale of 3D printing

Late last night I succeeded at something that I have been obsessing over for almost a year: printing City Hall.

City Hall
Thar she blows!

Last year, when I really started to get into printing on Hive76’s Makerbot 3D–PO, someone suggested printing Philadelphia’s grand City Hall. It took me many months of casual attempts before I was able to clean up the model I downloaded form Google’s 3D warehouse for printing. Once I had something that wasn’t full of holes, I dived in. After just a few attempts, I successfully printed City Hall in blue PLA and posted the whole thing to Thingiverse.

Shitty Hall
Shitty Hall

Since then I have been trying to replicate my succes in other materials. Some combination of the continuously–breaking Makerbot, the black PLA and my fledgling skills produced a monumental pile of failure I like to call Shitty Hall. The extruder would jam, the heated build platform would cool down, the X or Y axis would lose steps; everything went wrong repeatedly. I had enough failed prints that I clamped and welded them together to form the tallest shitty print ever printed at Hive76. After tweaking, greasing, cleaning, and learning just exactly every way that a Cupcake CNC can break, I gave it a shot in ABS. Once the first few critical layers went down well and the material was feeding properly from above, I relaxed. Two and a half hours later, I had my prize: a 3D printed City Hall in white ABS. Here’s a picture of the whole City Hall family, including Jordan’s successful first attempt at 1.5x. Now I need to print it again!

City Halls
City Halls

SketchUp class wrap up

Sorry for the delay, but on February 26th we had a successful class based on using SketchUp for 3D printing.

Shuriken
Shuriken

We had a few members and 2 strangers show up for the class. They learned how to make simple forms in SketchUp and design around the size limitations of the makerbot. The designed and printed objects included a Shuriken pictured here, a Barbie toilet, a rook, a laptop lid webcam mount, and a decorative unicorn. Class members: if you’re reading this, I highly recommend you upload your designs to Thingiverse so the rest of the world can print them!

Thanks for learning at Hive76!


New class: SketchUp for 3D Printing

made with SketchUp, printed at Hive76
Made with SketchUp, printed at Hive76

We are offering a class on how to use Google’s free 3D program SketchUp. SketchUp is not the most powerful CAD program out there, but its intuitive design and price make it a great start if you are curious about conjuring solid objects out of plastic and bytes.

This class will run Saturday, February 2/26 from 10am to 3pm at Hive76

You will learn:

  • How to make simple stuff in SketchUp
  • How not to ruin a model by poking holes in it, what “manifold” means.
  • The basic process of FDM 3D printing
  • The limitations of the Makerbot

And most importantly, you get to print and take home a thing!

Continue reading “New class: SketchUp for 3D Printing”

SloateBot: Prusa Mendel Lives!

The Prusa Mendel build is finally complete! Here’s a Stanford Bunny:

Prusa Mendel Bunny Print by jmil

PLA bushing sliding on precision ground 8 mm rods is actually quite smooth movement. I don’t think it can go as fast as the original Sells Mendel (which was ball bearings sliding over the rods), but it’s only half the printed parts and the z-axis is much smoother motion too. I will try oiling or greasing the bushings to try to get smoother and faster motion without losing steps. So definitely some tradeoffs but overall a super awesome bot. The Prusa is also fully parametric and entirely made from OpenSCAD. All sources are available on github FTW.

As this is the first bot I built that I actually own, I named this awesometown after my HS science teacher, Mr. Sloate, who really got me into Biology and now, robotics for Biology.

What will we print next?